
Repotting a bonsai tree is essential for maintaining healthy roots, fresh soil, and long-term growth. This guide walks through the physical process step by step: what to do once you’ve confirmed your tree needs repotting and the right season has arrived.
For timing and seasonal guidance, see our repotting timing guide.
For checking whether your tree needs it this year, see our late winter inspection guide.
Choosing the right soil and pot is as important as the repotting process itself. The wrong soil or an oversized pot are two of the most common causes of poor recovery after repotting.
As a general rule: avoid multipurpose compost or standard potting soil for bonsai. These retain too much moisture, restrict drainage, and compact quickly around roots, increasing the risk of root rot.
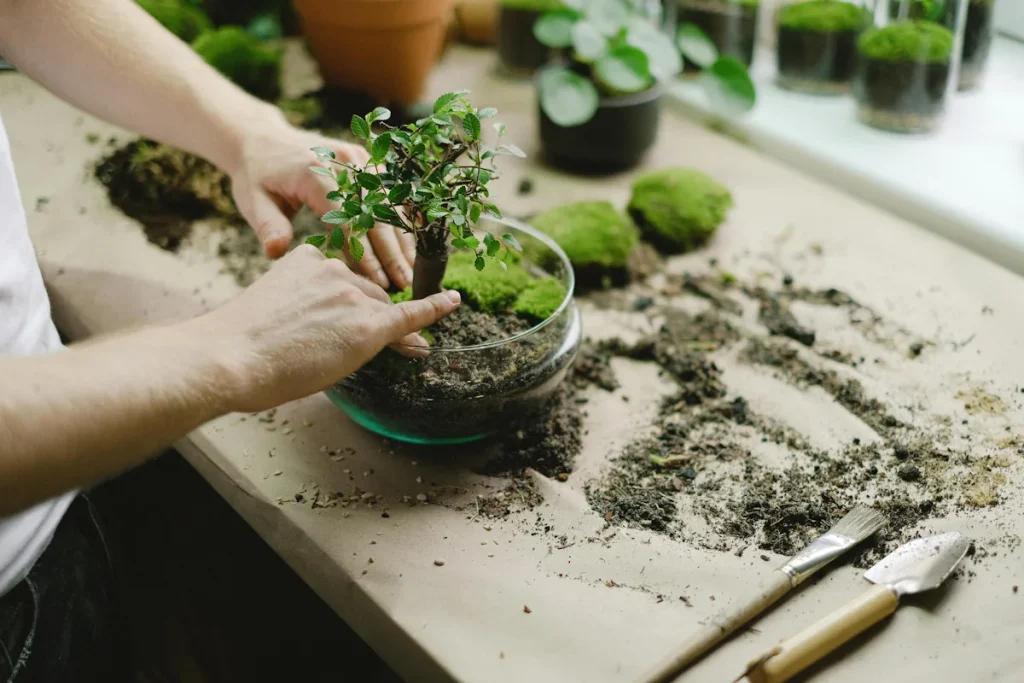
Use a spatula to loosen the edges if the pot is tight or lipped. This prevents strain on the roots during removal. Do not lift the tree by the trunk. Tilt the pot slightly and rock it gently to release the root mass without damaging the roots.
Use a root rake or chopstick to work from the trunk outwards, gently disentangling the roots so they radiate evenly.
Remove all old soil from the root system. Lightly wetting the roots can help wash away compacted soil and expose the root structure clearly.
Cleaning the roots allows you to identify unhealthy or excess roots and helps keep root-pruning tools sharp by removing grit.
Trim back the root system carefully, removing long, circling, or damaged roots.
Avoid cutting back too aggressively, as excessive root removal can stress the bonsai. The goal is to encourage fine feeder roots rather than reduce the root mass dramatically.
Ensure the pot is clean and dry before use. If reusing a pot, wash it thoroughly with water and mild washing-up liquid, then rinse and allow it to dry completely.
Place mesh over the drainage holes to prevent soil loss and pest entry. Thread wire through the holes and secure it underneath the pot, ready to anchor the tree.
Add a layer of fresh soil to the base and form a small mound where the tree will sit.
Place the bonsai on the soil mound, spreading the roots evenly and radially.
If using a round or oval pot, position the tree slightly off-centre and toward the back to improve balance and visual depth.
Secure the tree using the anchoring wires. Pull the wire firmly over the root mass and twist it together using pliers so the tree remains stable while new roots establish. Tuck the wire ends into the soil so they are not exposed.
Add dry bonsai soil gradually, filling in around and over the roots.
Use a chopstick to work the soil into gaps, ensuring full contact between soil and root surfaces. Gently tap the sides of the pot as you work to help the soil settle and eliminate air pockets.
Continue until the soil surface sits just below the rim of the pot.
Water the bonsai thoroughly until water drains freely from the bottom of the pot.
Place the tree in a shaded, sheltered location and keep the soil consistently damp while it recovers.
Do not feed the bonsai for at least one month, as fertiliser can burn freshly pruned roots. Allow the tree time to regain strength before resuming normal feeding.
Proper aftercare is essential after repotting a bonsai tree. During this period, the tree is recovering from root disturbance and root pruning, and incorrect care can slow recovery or cause decline.
Recovery time varies by species, but most bonsai show signs of renewed growth within several weeks if aftercare is correct.
For a full recovery timeline by species, see our guide to bonsai recovery after repotting.
If your tree shows signs of stress during this period, our guide to post-repotting stress covers what’s normal and what needs attention.
Start with the roots. Whether repotting goes well or badly depends almost entirely on the condition of the root system before you begin and the quality of the soil and pot you repot into. A tree with healthy, well-pruned roots in free-draining bonsai soil will recover quickly and grow with renewed vigour. The same tree repotted into compacted compost in an oversized pot can take months to recover, or decline entirely.
In our experience, the most common repotting mistake is doing it too often, too early, or into the wrong soil. Waiting until the tree is genuinely root-bound, using the correct species-appropriate timing, and repotting into quality bonsai soil are the three things that make the biggest difference to the outcome.
We are rated 5 stars across over 100 Google reviews, and our team is on hand by email and phone if you have any questions about repotting timing, soil selection, or aftercare. If you would prefer to have your bonsai repotted by an expert, we also offer a professional repotting service; bringing your tree to us ensures the work is done at the right time, with the right soil, and with full aftercare guidance included.
Repotting a bonsai tree can raise questions about timing, soil, pot size, and aftercare. The FAQs below address the most common bonsai repotting concerns to help you repot with confidence and avoid unnecessary stress to your tree.
Bonsai trees are intentionally grown in relatively small containers to restrict root growth and maintain their miniature size. However, the pot must still provide enough space for healthy roots and proper drainage. The goal is a balanced container that supports the tree while preserving the bonsai aesthetic.
Regular potting soil is usually too dense for bonsai trees. It can compact over time and retain too much moisture, which reduces airflow to the roots. Bonsai soil is specifically designed to provide better drainage and aeration, helping maintain a healthy root system.
The best time to repot most bonsai trees is in early spring, just before new growth begins. At this stage the tree is preparing for the growing season and can recover more quickly from root pruning and disturbance during the repotting process.

